Showing posts with label stone. Show all posts

Thursday, July 9, 2009

ant hill garnet and palladium white gold w/ patina

so things have been really busy - as you might have noticed in my lack of posting. I am finally starting to feel like I'm getting caught up. I still have.... well, a lot of work to do, but I've gotten over that hump of feeling completely overwhelmed. I opened my Etsy shop back up - I had decided to close it for a few days to give myself some breathing room. It really helped! Yesterday I completed some important projects I had been working on. This set included - the first tube setting in palladium white gold. I've done tube settings before, though just using ones that had been purchased. Since you can't buy tube settings in palladium white gold, I knew I had to make my own. And since the tubing existed - I figured I could do it. I had to do a practice one in sterling first and I think it turned out pretty fabulous!
sterling and tube set amethyst
Though oddly enough - I am finding that flush setting is easier for me. I was scared of it for so long and now when I have an extra few minutes I drill a hole in a discarded ring and throw a stone in just for extra practice! It revamps the ring and gives me more confidence in offering it to customers.
sterling and flush set champagne diamond


So, yup, I'm still really busy, but going to try to come back to a more balanced work load that includes at least a couple of blog posts a week!

Tuesday, June 16, 2009

flush set practice - reclaimed sterling and diamond ring - w/ patina

Out of need I finally did my first flush set a couple weeks ago. It turned out amazingly easier than I thought it would be. I wondered if it was a fluke though. It was a ring that I had cast the diamond in place - the diamond got a little burned, so I smashed it out and decided instead of redoing the whole ring, I would attempt to set the stone first. It worked great!.

I did a second one a couple days ago. Same situation - a ring that had two stones cast in place - one was PERFECT. The other... split down the middle and the metal cast through the stone. And the color of the stone changed. It was so weird. I smashed the damaged one out and and set another to match the one cast in place. I was extremely pleased and you can hardly tell any difference. (and if you are wondering how I am doing this smashing, a nail or chasing tool and a hammer. works great and is actually very fun)

So, after the two 'out of need' setting situations - I decided to do a few intentionally. Which meant practicing on a ring that was just hanging around - I 'reclaimed' it (filed, hammered, made it lovely and tough looking) and then decided i might as well set 3. In my attempt to unevenly space them - they ended up being a little more even than I had planned. Which I find very ironic - though its hard to photograph it so you can see all three at the same time.

I was really happy w/ how it turned out. I photographed it with a heavy patina, and w/ just a light patina - since it was practice, i figured I might as play w/ it.

Its not perfect, but thats why its called practice! I do have to say that my friends, Sara and Clare have been a big inspiration with their lovely flush settings. I've been putting it off for a long time as any time I read tutorials, it just seemed extraordinarily difficult. Once again, reminding me that just working it out on my own is a better way for me to learn that trying to actually follow instructions. Reading the instructions was good - but then forgetting half of them and just winging it is what works best for me!

I love the setting, all tucked away and kind of hidden in the metal - not sticking up or getting in the way. I love the action of the setting too, using the metal of the ring to hold the stone in. I love the look of casting them in place, like the metal grew around the stone, but these are a close second... if not a tie!

Wednesday, June 3, 2009

new organic vine rings


new organic vine rings
Originally uploaded by bcyrjewelry
I needed to remake a ring for a sweet gal and since it had been awhile since I had made one like it, I wanted to do a couple of 'practice' rings. I've been wanting to make some wider organic vine rings w/ stones for awhile and this was the perfect chance! I haven't listed them yet... hopefully later today - this is just a little tease. And there is another photo on flickr of the other ring - slightly different (of course) and w/ lapis. They are fused argentium sterling silver - though the fine silver bezel is soldered in (and intentionally made uneven for a truly organic look). oh and this stone is aventurine - one of my favorites.

Friday, May 29, 2009

New Setting!!

I am so incredibly excited about this. You know how sometimes you think about something too much and it turns it in to a huge seemingly insurmountable task. Well, finally, I worked on this design and it was a million times easier than what I had built it up in my head to be. I'm not sure why I thought it would be so difficult. Or maybe all that 'thinking' worked it out in my head so that finally when my hands got to it, they'd been mentally practicing for months? can that happen?!

I really like casting the diamonds in place b/c it gives a really nice and subtle look - but this is definitely a close second! I used a gold tube setting - well, b/c it was what I had, but also I really like the combo of mixed metals.

The excitement of finally creating this setting is that now I can do any kind of stone someone might want! Before, I was limited to diamonds, rubies and sapphires - or synthetic stones. And those don't even turn out every time they are fired (I'm working on that too though).

This ring had actually been a 'mistake' - and had a diamond in it that hadn't turned out. so I unearthed the damaged diamond, drilled a hole the setting would fit in to and soldered it in place. And lucky for me, its just my size! Sometimes I like to keep the prototype of something - it helps me remember what I did, where I've come from and how I can improve.

I hope today is as wonderful and successful of a day (for you too!).

Thursday, March 26, 2009

Rough Ruby Knot


Rough Ruby Knot and sterling
Originally uploaded by bcyrjewelry
Its an idea I've had rolling around for awhile, to get some rough diamonds rubies and sapphires to cast in place as my 'knots' And I finally got some to play with! This is the ruby version. It was one of my favorite of all the batch that I got and thought it looked perfect like a gnarled tree knot! Though I love working on custom orders, it was really fun to just make something that I've been wanting to do. Though I did make it in a size I couldn't wear! You can see the listing here and the green sapphire version here.

Thursday, January 15, 2009

palladium w. gold love knot w/ patina

I love working w/ palladium white gold - and I think it looks oh so lovely paired w/ a diamond and my tree bark texture! My new listing for EtsyMetal's New Release Thursday!

Tuesday, November 18, 2008

New Rings cont'd


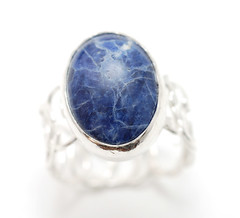
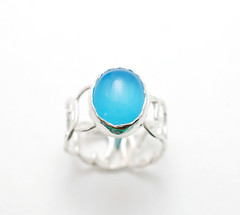
Here are the three rings all finished and they've been listed on Etsy now.
This one is sodalite and is listed here.


This one is aventurine and is here.


and this one is blue chalcedony and is here.


I was inspired to do these rings for several reasons. I'd been feeling kind of claustrophobic (for lack of a better word). I've been going through lots of things in my life and clearing out. There are several pieces I've had listed for sale and they haven't sold. I was tired of looking at them. Some pieces are going to be melted down in to something new, others will be turned in to something else! Like these rings! Some of the organic vine rings just didn't have the pizazz on their own that they needed, but as a band accompaniment to a lovely stone - they are perfect!! I feel like they are starting to give me the depth to my work I've been looking for.
I have so many stones that I really love and they just sit there. I'm hoping that habit is going to stop now and that I continue pairing up the stones to make some fabulous pieces.

I was also inspired by my friend Christine - who does amazing work, but like a lot of artists, is pushing herself forward and coming up with new designs to keep her creativity and passion in full swing. She created three rings that were just super lovely and inspired me to get out of my own run. Check out her shop - keep an eye on her - she is always adding new and amazing items.

Wednesday, October 22, 2008

Asheville Gem Show/ EtsyMetal meet up


beads asheville show
Originally uploaded by bcyrjewelry
I went to a fabulous gem show yesterday in Asheville and got to meet up with some fellow etsymetal members (Sara, Maggie and Danielle) for the first time!! We had a great time and it was just fabulous to meet them!

These are some of the beads I got and I am super excited about them. I have projects/ideas for all of them already. I also got some great cabs - you can see some on flickr - and of course, my main objective for going - Diamonds! I'm going to be expanding my natural and organic rings with more diamonds.

Not that I didn't have enough stones already, but I'm really excited about the things I got and hopefully will be using them ALL very soon!

Tuesday, October 7, 2008

Leaf and Diamond ring

This was another custom order - one of a pair I am working on for a sweet sweet couple. I love the simple elegance of the single tiny leaf imprint and slightly offset diamond. It was made in wax and the diamond was cast in place. I had initially finished it shinier and with the patina only in the leaf, but it was a little too 'blingy' (my word, not his!) for the groom, so I added some overall patina and kept a matte finish. Its simple, elegant and organic.

Check out flickr for more photos and the shiny previous version.

Thursday, September 18, 2008

Ring all finished


ring all finished
Originally uploaded by bcyrjewelry
This ring had to be remade. The first stone that was in it must have had some weak matrices (obviously) as a piece fell right out of the middle of the stone. It was the weirdest thing I had ever seen. You can see the original here. I didn't have any others really close to that size or shape, but went to the Franklin gem show a couple weeks after I got the ring back. So I was on a mission to find something kind of similar. I brought back about 10 stones for my customer to choose from, and I really think she got one of the best. It is so unique and reminded me of a Japanese landscape painting - an wirey looking tree growing up and off the size of a cliff. I was both sad and happy that she picked this stone. Sad to see it go, but then again, I liked it so much I probably would have left it in a drawer for a few years before ever using it! It is safely on her finger now.

Tuesday, September 16, 2008

Setting/Flossing Tip!


Tip photo.... flosssyyyy
Originally uploaded by bcyrjewelry
This is a pretty common tip, but if you haven't heard it, it can be a life saver (and a tooth saver!)

When working on settings and you want to check to make sure the fit is just right - use some dental floss under the stone. That way if the stone gets a little stuck - very easy to pull it right out. Otherwise, you risk tearing the whole setting apart just to get the stone out. And THAT is no good. I usually keep a random piece floating around on my work bench just to keep it handy. Floss works great because it can flatten out to almost nothing, but is plenty strong enough that if the stone is quite tight, you don't risk having it break when pulling the stone out.

Monday, September 15, 2008

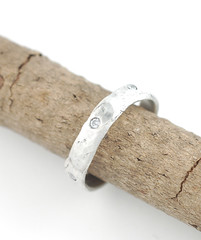
Tree bark ring set w/ diamond

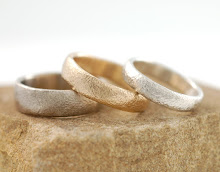
I have some of the most lovely customers. Julie from Vancouver, sent me her and her husbands wedding bands to melt down and cast in my tree bark texture. She also sent along her engagement ring with this sweet diamond. I absolutely love how they turned out!!

So I made some new rings in wax - added the diamond to hers and put them in the kiln! After waiting a several anxious hours, they were ready to cast - I melted down her rings and cast them. Then I had to wait another hour to let them cool - quenching too soon can shock a diamond and cause it to crack. Everything came out perfect!! I added a patina which gives gold such a lovely earthy tone. Who knew I'd be a gold and diamonds type of gal?!

I had actually done an experimental one with a smaller diamond a week ago, but when i tried photographing it... the lighting was all off. I'll have to rephotograph it and do a post on it too. A much smaller diamond, but super cute. I really like the contrast of using gold, giving it a rough and organic texture and pairing it with something sparkley, like a diamond.

I also got a couple of sapphires I am wanting to try - I think they will look gorgeous in silver or gold. So many things I want to try and so little time! I am off to get to work!