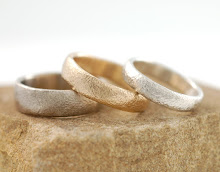
So I finally have the 'animation' process down. It is quite easy and loads of fun! I am by no means an expert, but its pretty simple. I should mention I am on a mac, so things might be different on a pc. Here's how I made mine:
1. Open up photoshop
2. Open images you want to use.
3. Crop all images the same size - add text if desired, then either flatten the image or 'merge visible' I like 'command E' (shortcuts are my friend)
4. I like to open a new blank canvas to paste them all in to, that way I can save it separate from all of the other images.
5. Copy and Paste each image to that one new canvas - You are creating a layer for each image, but since they are all the same size and opaque, you only see one image, basically just like stacking up pieces of paper, they're all there, but you can only see the top one. (Command A - select all, Command C - copy, click on new canvas, Command V - paste)
6. There is a nice little button in my version of photoshop that is at the bottom of the 'tools' bar "Edit in ImageReady" - it is also under 'File'
7. Image Ready opens up.
8. Make sure the animation window and layers window are both open. If not, go to 'window' and click to select them
9. This is where it started to get a little confusing for me, but once I did it a couple times, its really a cinch. One image, the top image, will appear in the animation window. Depending on how you layered the images and what image you want to have first will depend on the next step. It all has to do with the visibility (that little eye in the layers window). I usually layer mine so the first image ends up being #1 and at the bottom. So I deselect all of the visibility of the layers above it. Now I have the first image in the animation window.
10. To ad the second frame click the 'duplicate' icon in the animation window (should be right next to the trash can)
11. In the Layers window, click to make the second window visible. Now you should have two frames in your animation window with two different images. Continue to duplicate and adjust visibility based on what you want.
12. Once you have finished adding each frame, you need to adjust the time each frame will be visible. You will see a 0 sec under each frame, click the down arrow and change the time. For this animation I did 2 sec - you can experiment to what works best for you and by pressing the 'play' button can have a preview.
13. When you get the timing down, you're ready to save! Go to 'File' and 'Save Optimized As' and you are done!
There is obviously a lot more that you can do and honestly I don't know most of it! But that is the basic on how to make an animated ad! You can upload it to flickr or email simply as you would any other photo. When I first uploaded it to flickr, I thought it hadn't worked, but to view the animation you go to 'all sizes' and then the animation will work.
What's New!
1 week ago


![[Most Recent Quotes from www.kitco.com]](http://www.kitconet.com/images/quotes_special.gif)

3 comments:
Thanks Beth, I linked to this on my blog.
Thank you! It was easy to follow!
Now I only have to find out how I can link each image with a website!
If you know the answer... please let me know!
I'm not for sure.... my html is a little lacking. I know that it has something to do w/ the "href" that is at the beginning of a photo... like if you blog straight from flickr and look at the html - you'll see how it links back to flickr - you can change where it refers back to - but flickr doesn't like you do to that. I think you can with something like photobucket too??
Post a Comment